How to Construct a Pool Table: A Step-by-Step Guide
Creating your own pool table can be a rewarding and challenging project. In this article, we will walk you through the essential steps involved in constructing a custom pool table. From designing the frame to attaching the felt, our guide will provide you with all the necessary information to bring your very own billiard masterpiece to life. Get ready to showcase your craftsmanship and enjoy countless hours of playing on a table you built with your own two hands.
Constructing a Pool Table: A Step-by-Step Guide to Building Your Own Billiard Surface
Constructing a Pool Table: A Step-by-Step Guide to Building Your Own Billiard Surface
Introduction
Building your own pool table can be a satisfying project for any pool enthusiast. In this step-by-step guide, we will provide detailed instructions on how to construct your very own billiard surface.
Materials
To begin, gather the following materials:
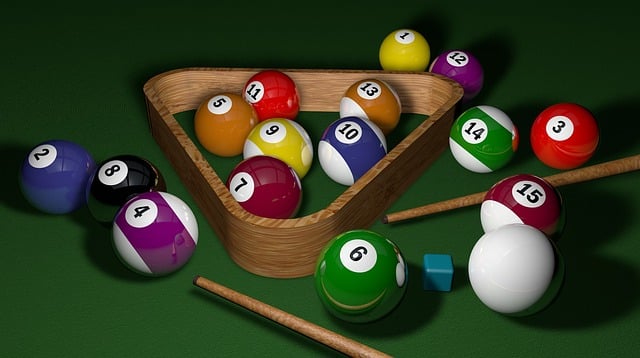
- High-quality hardwood boards for the frame and playing surface
- Rails made from solid wood or MDF
- Slate or alternative playing surface material
- Rubber cushions for the rails
- Felt cloth for covering the playing surface
- Pocket liners
- Screws, nails, and wood glue
Step 1: Design and Planning
Begin by designing your pool table to the desired dimensions. Consider factors such as room size, pool cue length, and playing comfort. Once you have a design in mind, create a detailed plan with precise measurements.
Step 2: Frame Construction
Start by constructing the frame using the hardwood boards. Cut the boards into the required lengths and join them together using screws and wood glue. Ensure that the frame is sturdy and level.
Step 3: Playing Surface Preparation
Next, prepare the playing surface. If using slate, cut it to fit the dimensions of the frame and secure it using adhesive. Alternatively, you can use alternatives such as plywood or composite materials. Ensure that the playing surface is perfectly level.
Step 4: Rail Installation
Attach the rails to the frame, ensuring they are securely fastened. Use screws or wood glue for this step. The rails should be positioned evenly around the perimeter of the playing surface.
Step 5: Cushion Installation
Attach the rubber cushions to the rails, ensuring they are aligned correctly. This step is crucial for optimal ball rebound and should be done carefully.
Step 6: Felt Application
Cover the playing surface with felt cloth, ensuring it is stretched tightly and secured to the edges of the table. Trim any excess material.
Step 7: Pocket Liners
Install the pocket liners at each corner and along the sides of the table. These liners will help guide the balls into the pockets accurately.
Step 8: Finishing Touches
Inspect your completed pool table for any imperfections. Sand down any rough edges and apply a finish or stain of your choice to enhance the table’s appearance and protect the wood.
Conclusion
By following this step-by-step guide, you can successfully construct your own pool table. Enjoy the rewarding experience of playing on a surface that you built yourself.
How Snooker Tables Are Made For International Tournaments
Greatest Shot in Pool History Complete
Materials and Tools Needed
To construct a pool table, you will need the following materials and tools:
Materials:
- Slate: The playing surface of a pool table is typically made of slate due to its flatness and durability.
- Rails: Wooden rails are used to create the boundaries of the table and provide cushioning for the balls.
- Cloth: The cloth on the playing surface should be made of a smooth and durable material, such as worsted wool.
- Pockets: You will need pocket inserts and liners to create the holes where balls are pocketed.
- Frame: The frame provides support for the slate and rails, and it can be made of various materials like wood or metal.
Tools:
- Saw: A saw is necessary to cut the wood for the table frame and rails.
- Drill: You will need a drill to make holes for screws and other fixtures.
- Screwdriver: A screwdriver is essential for fastening the various components of the table together.
- Staple gun: This tool is needed to secure the cloth to the table surface.
- Level: A level ensures that the playing surface is perfectly flat.
Construction Steps
Step 1: Build the Table Frame
- Cut the wood according to the dimensions of the desired table size.
- Assemble the frame using screws and a screwdriver.
- Ensure the frame is sturdy and level by using a level.
Step 2: Install the Rails
- Attach the rails to the table frame using screws and a screwdriver.
- Make sure the rails are evenly spaced and securely fastened.
Step 3: Add the Playing Surface
- Place the slate on top of the table frame, ensuring it fits snugly.
- Secure the slate to the frame using screws and a screwdriver.
- Use a level to ensure the playing surface is perfectly flat.
Step 4: Attach the Cloth
- Lay the cloth on the playing surface, ensuring it is smooth and free of wrinkles.
- Start at one end and use a staple gun to attach the cloth to the table frame.
- Stretch the cloth tightly as you work your way around the table.
Finishing Touches
Step 5: Install the Pockets
- Insert pocket liners into the holes on the table rails.
- Attach pocket inserts to the liners using screws and a screwdriver.
- Make sure the pockets are properly aligned and securely attached.
Step 6: Level the Table
- Use a level to ensure the table is perfectly leveled in all directions.
- Adjust the table feet or add shims as necessary to achieve a level playing surface.
Step 7: Test and Enjoy
- Once all the construction steps are complete, test the table by playing a few games.
- Make any necessary adjustments according to your playing experience and preferences.
- Finally, sit back, relax, and enjoy your newly constructed pool table!
FAQ
FAQ: What materials are commonly used to construct a pool table?
The most common materials used to construct a pool table are: slate for the playing surface, typically covered with cloth; wooden or metal frames for support; and rubber cushions for the rails.
FAQ: How long does it take to build a pool table?
The time it takes to build a pool table varies depending on factors such as the complexity of the design, materials used, and the manufacturer’s production schedule. On average, it can take several weeks to several months to complete a pool table.
FAQ: Are there any specific dimensions or regulations for constructing a pool table?
Yes, there are specific dimensions and regulations for constructing a pool table. The World Pool-Billiard Association (WPA) and the Billiard Congress of America (BCA) have established standard specifications for pool tables. The playing surface, known as the slate, should typically measure 8 feet, 9 feet, or 10 feet in length, and is usually covered with a felt cloth. The width of the table should be half its length, and the height from the ground to the top rail should be approximately 31 inches. These dimensions ensure consistent gameplay and fair competition.
In conclusion, constructing a pool table is no easy task, but with the right guidance and knowledge, it is certainly achievable. By following step-by-step instructions and paying attention to important details such as the frame, slate installation, and felt application, you can create a sturdy and professional-looking playing surface. Additionally, choosing high-quality materials and tools will ensure the longevity and performance of your table. Remember, patience and precision are key when undertaking this project. So go ahead, gather your supplies, put on your DIY hat, and embark on the rewarding journey of building your very own pool table. Happy playing!